
Mastering the Art of Canning for Food Preservation
What Is Canning and How Does It Work?

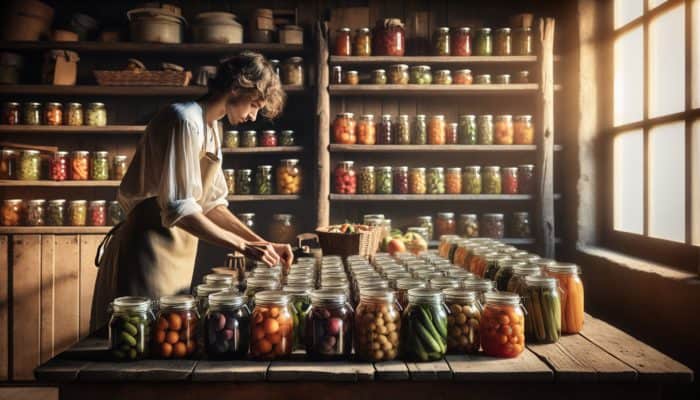
Canning Food Basics: Canning is a highly effective method of preserving food that involves processing food ingredients and sealing them in an airtight container. This process significantly extends the shelf life of various foods. Originating in the late 18th century, canning has transformed into a cherished activity for both home cooks and professional food producers. The typical canning process includes heating the food to eliminate harmful bacteria, molds, and yeasts that could lead to spoilage or foodborne diseases. By creating a vacuum seal, canning effectively blocks new microorganisms from entering, which helps ensure that the food remains both safe and delicious.
The flexibility and versatility of canning attract food enthusiasts globally, allowing them to capture the peak flavours of seasonal produce. There are various canning methods available, enabling individuals to preserve a wide range of foods, from fruits and vegetables to meats and sauces. This practice not only allows for year-round enjoyment of seasonal treats but also plays a crucial role in reducing food waste, promoting sustainability, and self-sufficiency across diverse culinary cultures worldwide.
Discover the Advantages of Canning for Food Preservation
Canning offers numerous benefits that resonate with home cooks and food preservationists from around the world. One significant advantage is the preservation of food's nutritional value. By sealing in freshness shortly after harvest, canning helps maintain essential vitamins, minerals, and flavours that might otherwise degrade over time. This method also enhances food safety by preventing microbial growth, which is particularly crucial in numerous culinary traditions that depend on seasonal ingredients.
Moreover, canning offers a practical solution for long-term storage of seasonal produce, allowing individuals to relish their favourite foods during off-seasons or in times of scarcity. The ability to stockpile various goods—whether it’s canning a summer bounty of tomatoes or a winter supply of pickled vegetables—ensures a stable food source. Additionally, canning can serve as a cost-effective alternative to purchasing processed foods, enabling individuals to control the ingredients and flavours while potentially cutting down on grocery expenses.
Canning also nurtures a profound connection to food and culture. Whether you are canning tomatoes from your garden in Tuscany, pickling cucumbers in a traditional Japanese style, or making jams from tropical fruits in the Caribbean, each regional approach brings a unique flair to the canning process. Ultimately, this preservation method aligns personal tastes with sustainability and nutritional health, creating a rich tapestry of culinary heritage.
Essential Equipment for Successful Canning
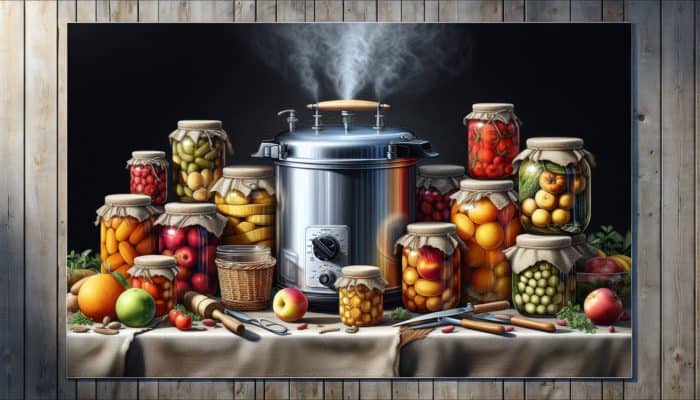
To engage effectively in canning, certain essential equipment is required, including jars, lids, a canner, and various utensils designed to facilitate the canning process. High-quality glass jars that can withstand heat are foundational; they come in several sizes, providing flexibility for different types of food. Additionally, lids must create an airtight seal, and it is crucial to use new lids for each canning session to ensure optimal safety and performance.
Choosing the correct canner is vital for successful food preservation. Water bath canners are ideal for high-acid foods, such as fruits and jams, while pressure canners are necessary for low-acid foods, including vegetables and meats. Using the appropriate canner ensures that the food reaches the necessary temperatures to eliminate harmful bacteria effectively.
Utensils, including jar lifters, funnels, and bubble removers, are indispensable for the canning process. Jar lifters facilitate the safe handling of hot jars, while funnels help prevent spills during filling. Bubble removers are crucial for ensuring even packing and preventing air pockets, which can jeopardise the sealing process. Collecting all these tools before starting ensures a smooth and efficient canning experience, ultimately leading to successful food preservation.
Expert Guidelines for Mastering Food Canning Techniques
What Are the Best Practices for Canning to Ensure Quality?
To guarantee food safety and maintain high quality during canning, adhering to best practices is essential. A fundamental guideline is the importance of using tested recipes. This ensures that the processing times, temperatures, and methods have been scientifically validated for safety. Reputable sources, such as the National Center for Home Food Preservation, offer a wealth of reliable recipes tailored to various food types, ensuring consistency across different canning experiences.
Proper sterilisation of jars and lids is another critical best practice. Before beginning the canning process, jars should be washed in hot, soapy water and sterilised by boiling in water for at least 10 minutes. Following this, lids should be simmered in hot water to ensure they seal correctly. These meticulous steps minimise the risk of contamination, significantly contributing to food safety and quality.
Monitoring the processing time and temperature is vital for maintaining the quality of food during canning. Each recipe will specify particular processing times based on the food type, jar size, and canning method. For instance, low-acid foods, such as green beans, require longer processing times at higher pressures than high-acid foods, like strawberries. Adhering to these precise guidelines is essential for producing delicious and safe canned goods.
How Can You Ensure Food Safety During the Canning Process?
Maintaining food safety during the canning process involves several actionable steps. Firstly, it is crucial to select fresh, high-quality ingredients. Overripe or defective produce can introduce bacteria into the jars, jeopardising food safety. Therefore, choosing fruits and vegetables that are firm and free from blemishes ensures a longer shelf life and superior taste.
Another important step is to check seals after processing. Once the jars have cooled, press down on the centre of each lid. If it pops back, the seal is not tight, and the jar needs to be refrigerated and used within a few days. Properly sealed jars should not flex when pressed and should create a vacuum, indicating a successful sealing process.
Monitoring pressure levels when using a pressure canner is also essential. Ensuring that the correct pressure is maintained throughout the canning process prevents the growth of harmful bacteria. For instance, low-acid foods, such as meats and certain vegetables, require a pressure of 10 to 15 pounds, depending on your altitude. Following specific guidelines for your locality ensures that your canned goods are safe for consumption.
What Are Common Mistakes to Avoid When Canning?

Avoiding common mistakes in canning is crucial for successful preservation and food safety. A prevalent error is under-processing jars, which can allow bacteria to survive and potentially cause foodborne illnesses. Each food type has specific processing times and methods that must be strictly followed for safe canning.
Another common mistake involves overfilling jars. Leaving insufficient headspace—typically 1/2 inch for jams and preserves or 1 inch for vegetables—can prevent proper sealing and lead to spoilage. Adequate headspace allows the food to expand during processing, which is critical for maintaining an airtight seal.
Failing to use the correct acidity level in canned foods is also a frequent oversight. Low-acid foods must be processed using a pressure canner to reach temperatures high enough to eliminate harmful bacteria. In contrast, high-acid foods can be processed using a water bath canner. Neglecting this crucial step can compromise both food safety and quality.
Finally, overlooking signs of spoilage before consuming canned goods can pose health risks. Always inspect jars for bulging lids or unusual odours before opening. If any signs of spoilage are present, it is wise to err on the side of caution and discard the contents.
What Equipment Is Essential for Effective Canning?
For safe and effective canning, possessing the right equipment is paramount. Essential tools include:
- Glass Jars: These jars are designed to withstand heat and create an airtight seal. They come in various sizes, suitable for different types of food.
- Lids: New lids are crucial for ensuring a proper seal. They should be used only once, as repeated use can compromise their ability to seal effectively.
- Canner: Depending on what you’re canning, either a water bath canner for high-acid foods or a pressure canner for low-acid foods is needed to achieve safe temperatures.
- Jar Lifters: These specialised tongs are designed to safely lift hot jars out of the canner without risking burns or spills.
- Funnel: A canning funnel assists in filling jars without creating a mess. It guides food into the jar while leaving the necessary headspace.
- Bubble Remover: This tool helps remove trapped air bubbles in jars, ensuring proper sealing and preventing spoilage.
- Timer and Thermometer: These tools are essential for accurately monitoring processing times and temperatures, ensuring food safety.
- Dish Towels: Mildly damp towels can be indispensable for cleaning spills and handling hot jars.
Utilising the appropriate equipment not only enhances efficiency but also significantly contributes to the safety and quality of the canned products. Investing in durable tools ensures a long-lasting canning experience, enabling enthusiasts to preserve their favourite foods effectively.
How to Choose the Right Canning Method for Your Needs?
Selecting the appropriate canning method is essential for ensuring food safety and maintaining quality. The two primary techniques are water bath canning and pressure canning, each best suited for different types of foods based on their acidity levels. High-acid foods, such as fruits, jams, jellies, and pickles, can be safely processed using a water bath canning method. This method involves submerging jars in boiling water, which effectively kills off bacteria and creates a vacuum seal as the jars cool.
Conversely, low-acid foods, which include most vegetables, meats, and poultry, require pressure canning. This method utilizes a specialized pressure canner to reach higher temperatures, which is essential for eliminating harmful bacteria such as Clostridium botulinum. Achieving these high temperatures is crucial for ensuring food safety and extending the shelf life of low-acid foods.
When selecting a method, consider the specific food being preserved. For instance, tomatoes can be either low-acid or high-acid, depending on the variety and the addition of ingredients like lemon juice or vinegar, which can increase acidity. Understanding these distinctions is crucial when choosing the right canning method to ensure the highest quality and safety of preserved foods.
Exploring Different Canning Methods
What Is Water Bath Canning and How Is It Done?
Water bath canning is a method specifically designed for high-acid foods, such as fruits, pickles, and jams. This technique involves submerging jars filled with prepared food in boiling water for a set period, effectively eliminating harmful microorganisms. The boiling water creates a vacuum seal as the jars cool, ensuring that the contents remain fresh and safe for consumption.
The process begins by preparing jars and lids, then filling the jars with your chosen high-acid food while leaving the appropriate headspace. Once filled, the jars are carefully placed into a water bath canner—typically a large pot with a rack—and submerged in boiling water. The jars must remain in the boiling water for a specific amount of time, depending on the type of food and the size of the jar. After processing, the jars are removed and placed on a clean towel or rack to cool.
Water bath canning is popular among home canners due to its simplicity and effectiveness. It allows for a wide variety of recipes, from sweet fruit preserves to tangy pickles. Understanding the importance of acid content and processing time is crucial for achieving safe and delicious canned goods.
What Is Pressure Canning and How Does It Work?
Pressure canning is a method used primarily for low-acid foods, such as vegetables, meats, and poultry. Unlike water bath canning, this technique utilises a pressure canner to reach higher temperatures, which are necessary to eliminate harmful bacteria that may be present in low-acid foods. This method is vital for ensuring food safety and extending shelf life.
The process begins similarly to water bath canning, with the preparation of jars and lids. After filling the jars with food, they are placed in the pressure canner, which is then sealed and heated. As the temperature rises, pressure builds inside the canner, allowing the contents to reach temperatures above the boiling point of water. This high temperature is crucial for killing off any potential pathogens, including Clostridium botulinum.
Once the processing time is complete, the pressure must be released slowly before opening the canner. Properly sealed jars can then be removed and placed on a cooling rack. It’s essential to monitor the pressure throughout the process to ensure the safety and quality of the canned goods. Mastering pressure canning is crucial for anyone seeking to preserve a range of low-acid foods while ensuring food safety.
Which Canning Method Should You Use for Your Foods?
Choosing the right canning method depends primarily on the acidity of the food being preserved. High-acid foods, which include most fruits, pickles, and tomato products with added acid, can safely be processed using the water bath canning method. This technique is relatively simple, requiring just boiling water and a large pot, making it accessible for novice canners.
Conversely, low-acid foods, such as vegetables, meats, seafood, and poultry, require pressure canning to eliminate harmful bacteria safely. This method is more complex, as it involves specialised equipment, but it is essential for ensuring food safety and extending the shelf life of these products.
For example, if you're considering canning peaches, which are high in acidity, water bath canning would be suitable. However, if you're canning green beans, which are low in acidity, pressure canning would be mandatory to ensure safe preservation. Understanding these distinctions is critical for successful canning and ensuring the safety of your preserved foods.
Preparing Food for Canning: A Comprehensive Guide
How to Select the Best Produce for Effective Canning?
Selecting the best produce for canning is a crucial step that significantly impacts the final product's taste and safety. When choosing fruits and vegetables, aim for those at their peak ripeness, as they offer the best flavour and texture. Fresh produce not only enhances the quality of canned goods but also contributes to longer shelf life. Here are some key characteristics to look for:
- Firmness: Select produce that is firm to the touch; avoid soft or overripe items, as they may spoil quickly.
- Colour: Look for vibrant colours, which often indicate freshness and ripeness.
- Blemishes: Avoid fruits or vegetables with blemishes, bruises, or signs of decay, as these can lead to spoilage and contamination.
- Seasonality: Select items that are in season, as they are more likely to be fresh and flavourful.
For instance, when selecting tomatoes for canning, look for varieties that are plump and free from cracks. For pickling cucumbers, firm, small to medium-sized cucumbers are ideal, as they retain their crispness after processing. When selecting fruits such as peaches or pears, opt for those with a full, fragrant aroma, indicating they are ripe and ready for canning.
Taking the time to select the best produce ensures that your canned goods are not only flavourful but also maintain high nutritional value, making it a crucial step in the canning process.
What Are the Steps for Preparing Food for Canning?
Preparing food for canning involves several steps that require careful attention to ensure safety and quality. The first step is to clean the produce thoroughly under running water to remove dirt and potential pesticide residues. Once cleaned, the next step often involves peeling, chopping, or slicing the fruits or vegetables as necessary, depending on the specific canning recipe being followed.
Following the recipe’s guidelines for preparation is crucial, as different foods require specific methods. For instance, when canning tomatoes, you may need to blanch and peel them to remove the skin, while fruits like peaches might require pitting before canning. It is essential to have all ingredients prepped and measured before beginning the canning process, as this streamlines the workflow and reduces the risk of forgetting any important steps.
Another important aspect of preparation is ensuring that any necessary acid—such as lemon juice or vinegar—is added to the food before it is canned. The right acidity level not only enhances flavour but is also critical for safety, especially in low-acid foods. Properly preparing your ingredients lays the foundation for successful canning, resulting in high-quality preserved foods.
How to Handle Different Types of Food for Canning?
Handling different types of food for canning varies depending on the type of produce being preserved. For instance, fruits often need specific treatments before canning. When canning apples, removing the core and slicing them can be essential to ensure even cooking and proper sealing. Additionally, treating the slices with lemon juice can prevent browning during the canning process.
Vegetables, on the other hand, often require blanching before canning. Blanching involves briefly immersing the vegetables in boiling water, which helps preserve colour, texture, and nutritional value. For example, when canning green beans, blanching them for a few minutes stops enzyme actions that can lead to spoilage. After blanching, the beans should be quickly cooled in ice water to stop the cooking process.
When it comes to meats, proper handling is crucial for food safety. For meats, ensure they are trimmed, cut into appropriate sizes, and cooked thoroughly before placing them in jars. Whether you are canning chicken, beef, or pork, it’s essential to follow specific guidelines for processing times and pressure levels to ensure the food is safe to eat after canning.
Understanding the specific requirements for handling different types of food enhances the canning experience and contributes to the production of high-quality preserved goods.
How to Use Acid and Salt Effectively in Canning?
Acid and salt are crucial components in the canning process, playing essential roles in preserving food and enhancing flavour. Acid, whether from vinegar, lemon juice, or citric acid, helps lower the pH level of foods, which is vital for ensuring safety, particularly in low-acid foods. The addition of acid not only aids in food preservation but also helps to maintain the food's colour and texture.
For example, when canning tomatoes, adding either lemon juice or citric acid ensures that the acidity level is sufficient to prevent the growth of harmful bacteria. The USDA recommends adding two tablespoons of bottled lemon juice or 1/2 teaspoon of citric acid per quart of tomatoes. This practice is essential for maintaining safety in the canning process.
Salt, on the other hand, serves multiple purposes, including flavour enhancement and acting as a preservative. While it is not necessary for the preservation of all canned foods, it can improve taste and texture. When canning vegetables, such as cucumbers for pickling, using salt not only enhances flavour but also helps maintain crispness. It is essential to use canning or pickling salt, as it does not contain additives that can cloud the brine.
Understanding the roles of acid and salt in the canning process enables better control over flavor and safety, ensuring that your preserved foods are both delicious and safe to consume.
What Equipment Do You Need for Effective Canning?
Proper canning requires specific equipment to ensure that the process is safe and effective. Essential tools include:
- Glass Jars: These come in various sizes, ranging from half-pints to quarts, and are durable enough to withstand heat.
- Lids: New lids are necessary for each canning session to ensure a proper seal; reusable lids are not recommended for safe canning.
- Canner: Depending on the type of food, either a water bath canner for high-acid foods or a pressure canner for low-acid foods is necessary.
- Jar Lifters: Essential for safely removing hot jars from the canner without burns or spills.
- Funnel: Helps to neatly pour food into jars while preventing mess and ensuring proper headspace.
- Bubble Remover: This tool is used to eliminate air pockets trapped in jars, which is vital for achieving a proper seal.
- Timer and Thermometer: To accurately monitor processing times and temperatures for safety.
- Dish Towels: Useful for cleaning spills and handling hot jars throughout the process.
Having the right equipment not only streamlines the canning process but also significantly impacts the safety and quality of the canned goods. Investing in reliable tools ensures that both novice and experienced canners can effectively preserve their favourite foods.
Understanding the Canning Process in Detail
How to Properly Sterilize Jars and Lids for Canning?
Sterilising jars and lids is a critical step in the canning process that prevents contamination and ensures food safety. The first method involves boiling, a straightforward and effective approach. Begin by washing the jars and lids in hot, soapy water to remove any residues. Rinse thoroughly before proceeding.
To sterilise using boiling water, fill a large pot with water and bring it to a rolling boil. Submerge the clean jars in the boiling water for at least 10 minutes. For lids, simmering in hot (not boiling) water for about 5 minutes is sufficient. This method not only kills any lingering bacteria but also ensures that the jars are heated evenly, preventing breakage when filled with hot food.
Alternatively, for those with a dishwasher, running the jars through a hot cycle can also achieve sterilisation. Ensure that the dishwasher is set to a high-temperature setting without any detergent residue. After sterilisation, allow the jars and lids to remain in the hot water until you are ready to fill them. This step is crucial for maintaining the safety and quality of your canned goods.
What Are the Steps for Filling Jars Correctly?
Filling jars correctly is crucial for ensuring a successful canning process. Start by preparing your food according to the recipe, ensuring it is cooked, peeled, or sliced as needed. Using a canning funnel, fill each jar with the prepared food, leaving the appropriate headspace as specified in the recipe—typically 1/4 to 1 inch, depending on the type of food.
After filling, it’s essential to remove air bubbles trapped in the jar. This can be done using a bubble remover, which helps to slide around the inside of the jar, releasing any bubbles that may compromise the seal. Once bubbles are removed, wipe the rim of the jar with a clean, damp cloth to remove any food residue that could interfere with the sealing process.
Next, place the sterilised lid on the jar, ensuring it is centred. After placing the lid, screw on the jar band until it is fingertip-tight—this allows for the necessary expansion of food during processing while still ensuring a tight seal. Following these steps ensures that your jars are filled properly, setting the stage for successful food preservation.
How to Process and Seal Jars for Long-lasting Preservation?
Processing jars is a critical step that involves heating them to eliminate bacteria and create a vacuum seal. Depending on the chosen canning method —whether water bath or pressure canning —the process will vary slightly.
For water bath canning, place the filled jars into a canner filled with boiling water. The jars should be covered by at least 1 inch of water to ensure even processing. Maintain a rolling boil and process for the time specified in your recipe, which varies depending on the type of food and the jar size. Once the time is up, carefully remove the jars using jar lifters and place them on a clean towel or cooling rack to cool.
For pressure canning, after placing the jars in the pressure canner, secure the lid and heat until steam escapes, then allow the canner to reach the required pressure. Once the pressure is reached, process for the time indicated in the recipe. After processing, turn off the heat and allow the canner to cool naturally, then release any remaining pressure. Remove the jars and place them on a towel or rack to cool completely.
After cooling, check the seals by pressing down in the centre of each lid. If it does not pop back, the jar is sealed correctly. If it does, the food should be refrigerated and used within a few days. Properly processing and sealing jars ensures the safe, long-lasting preservation of canned goods.
Optimal Storage Practices for Canned Food
What Are the Best Storage Conditions for Canned Goods?
The storage conditions of canned food are crucial for maintaining quality and extending shelf life. Ideally, canned goods should be stored in a cool, dark place, away from direct sunlight, as this can degrade the food's quality over time. A temperature range of 50°F to 70°F (10°C to 21°C) is optimal for preserving the quality of canned goods.
Furthermore, it’s essential to avoid storing canned foods in areas with high humidity or significant temperature fluctuations, as these conditions can lead to spoilage. A pantry or cupboard that remains consistently cool and dry is ideal. Additionally, keeping canned goods away from strong odours, chemicals, and cleaning agents is essential, as they can permeate the jars and negatively affect the flavour.
Organising canned goods by expiration date is a practical method for ensuring freshness. Place items that will expire soonest at the front and use a FIFO (First In, First Out) system to minimise waste and ensure that older jars are consumed first. Proper storage not only helps maintain the quality of your canned foods but also makes it easier to manage your pantry inventory.
How Long Can Canned Food Last in Storage?
Canned food can have an exceptional shelf life, lasting up to a year or more if stored under proper conditions. High-acid foods, such as canned tomatoes or fruits, typically last for 1 to 1.5 years, while low-acid foods, including vegetables and meats, may last for 2 to 5 years. However, these timeframes can vary based on the type of food, acidity, and storage conditions.
It is crucial to regularly check your canned goods for signs of spoilage, which can occur even within the suggested shelf life. Look for bulging lids, leaks, or off odours when opening jars, as these are indications that the contents may be compromised. If you notice any of these signs, it is wise to discard the food to avoid health risks.
While canned foods can last beyond their expiration date if stored properly, it is essential to prioritise safety and quality when consuming preserved foods. Keeping an eye on expiration dates and proper storage techniques ensures that you enjoy the best flavours and safety from your canned goods.
How to Check for Spoilage in Canned Goods?
Checking for spoilage is an essential practice for ensuring the safety of canned foods. Before opening any jar, inspect the exterior for signs of damage or bulging lids, which indicate that gas has built up inside due to microbial activity. If a jar's lid is bulging when you press down, do not consume the contents.
Once opened, check for signs such as mould, gas bubbles, or unusual odours. If there is any sign of spoilage, including a sour smell or cloudy liquid, discard the contents without tasting them. Trust your senses—if something seems off, it’s better to err on the side of caution.
In addition to visual and olfactory inspections, it’s essential to monitor the consistency of the food. If it appears overly mushy or has developed unusual textures, these can also indicate spoilage. Regularly checking your canned goods before consumption helps prevent health risks and ensures that you enjoy safe, high-quality preserved foods.
How Should Canned Food Be Organized for Efficiency?
Organizing canned food effectively is crucial for maximizing efficiency and minimizing waste. A systematic approach not only helps in easily locating items but also ensures that you consume them before they expire. One effective method is to sort the canned goods by category—group similar foods together, such as fruits, vegetables, sauces, and meats. This way, you can quickly find what you need without rummaging through a cluttered pantry.
Additionally, it's highly recommended to implement a FIFO (First In, First Out) system. Place jars that are nearing their expiration date at the front of the shelf, making them more accessible for consumption. Newly canned goods should be placed at the back, ensuring that older items are used first. Regularly reviewing the inventory in your pantry can help you maintain this organisational system and minimise food waste.
Using labels can also aid in organisation, especially if you are canning different varieties or experimenting with flavours. Clearly labeling jars with their contents and the date of canning enables anyone in the household to identify what's in each jar easily. This practice not only enhances the organisation but also brings joy to discovering home-canned delights throughout the year.
Advanced Canning Techniques for Enthusiasts
What Is Pickling and How Do You Do It?
Pickling is a method of preserving food in a vinegar solution, which not only extends the shelf life but also adds delicious flavours to the preserved items. This technique has a rich history, with culinary traditions involving pickling found across various cultures worldwide. From tangy dill pickles in the United States to kimchi in Korea, pickling can be applied to a wide array of vegetables, fruits, and even meats.
The pickling process begins by preparing the vegetables or fruits, which may involve washing, peeling, or slicing, depending on the recipe. After preparation, a vinegar brine is created, typically consisting of vinegar, water, salt, and spices. The prepared produce is then submerged in this brine and usually processed either through water bath canning or stored in the refrigerator if consumed within a short time.
Pickling not only preserves food but enhances flavours through the infusion of spices and herbs. For instance, adding garlic, dill, or mustard seeds can elevate the taste of pickled cucumbers. Additionally, experimenting with sugar or different types of vinegar allows for a wide range of flavour profiles, making pickled items versatile ingredients in various culinary dishes.
What Is Fermentation and Its Benefits?
Fermentation is a natural preservation method that harnesses the power of beneficial bacteria to enhance flavours and increase the nutritional value of foods. Commonly associated with foods like sauerkraut, kimchi, and yogurt, fermentation transforms ordinary ingredients into probiotic-rich delicacies that offer various health benefits.
The fermentation process begins by creating an anaerobic environment, which is achieved by submerging the food in a saltwater brine or using specific starter cultures. As the beneficial bacteria consume sugars in the food, they produce lactic acid, which preserves the food and develops unique flavours. For example, when making sauerkraut, shredded cabbage is mixed with salt, then packed tightly into a jar to allow for fermentation.
Fermented foods boast numerous health benefits, including improved digestion due to the presence of probiotics. Additionally, they can add exciting flavours to meals, providing a tangy depth to dishes. Experimenting with fermentation can lead to a diverse array of culinary creations, allowing for personalisation in flavour and texture.
How to Experiment with Flavours in Your Canning Projects?
Experimenting with flavours in canning can lead to unique and exciting culinary creations. Adding herbs, spices, or other ingredients can transform traditional recipes into something truly special. For example, when canning peaches, consider including fresh basil or mint for an unexpected flavour twist. Similarly, pickled vegetables can benefit from the addition of garlic, chilli flakes, or even citrus zest, which can enhance the overall taste profile.
When experimenting, it's essential to keep a few guidelines in mind. Start with small batches to test flavour combinations before committing to larger quantities. This approach allows for adjustments without wasting a significant amount of ingredients. Additionally, always adhere to safety guidelines regarding acidity levels, especially when modifying recipes for low-acid foods.
Consider also pairing different methods. For instance, using both pickling and fermentation techniques can yield interesting results, such as a spicy fermented pickle. There’s no wrong way to experiment, so let your creativity guide you and enjoy discovering new flavours that reflect your tastes.
How to Use Pressure Canning Safely and Effectively?
Using pressure canning is essential for safely preserving low-acid foods such as vegetables, meats, and poultry. This method requires a specialised pressure canner, which creates a sealed environment that allows for higher temperatures than boiling water can achieve, thus effectively eliminating harmful bacteria.
To begin pressure canning, ensure that your jars are prepared and filled according to your recipe, leaving the appropriate headspace. Place the jars in the pressure canner, ensuring they’re not touching each other, and add the required amount of water as specified in the canner's guidelines. Secure the lid and heat the canner until steam escapes from the vent, indicating that pressure is building.
Once the canner has reached the recommended pressure, maintain this pressure for the time specified in your recipe, which may vary based on the type of food. After processing, turn off the heat and allow the canner to cool naturally, ensuring the pressure releases fully before removing the lid. This careful approach ensures the safety and quality of your preserved foods, allowing you to enjoy low-acid items throughout the year.
Frequently Asked Questions About Canning
What types of food can be canned effectively?
Most fruits, vegetables, jams, jellies, meats, and pickles can be safely canned. It's essential to follow tested recipes for each type to ensure safety and optimal results.
What is the difference between water bath and pressure canning?
Water bath canning is suitable for high-acid foods, whereas pressure canning is necessary for low-acid foods to reach the required temperatures for safe preservation.
How long can home-canned goods last in storage?
Home-canned goods can last from one to five years, depending on the type of food and storage conditions. Always check for signs of spoilage before consuming.
Do I need to sterilise jars before canning?
Yes, sterilising jars is essential to prevent contamination and ensure food safety during the canning process.
Can I reuse canning lids?
No, canning lids should be used only once. Reusing lids can compromise the seal, leading to spoilage.
How can I tell if my canned food has spoiled?
Look for bulging lids, off odours, mould, or gas bubbles upon opening. If any signs of spoilage are present, discard the food immediately.
What is the best way to store canned foods?
Canned foods should be stored in a cool, dark, and dry place, ideally in temperatures between 50°F and 70°F.
Is it safe to can food without adding salt?
Yes, salt is optional in canning. However, it enhances flavour and helps preserve the food's texture.
Can I cook low-acid foods in a water bath?
No, low-acid foods must be processed in a pressure canner to prevent the risk of foodborne illnesses.
What are some common mistakes to avoid in canning?
Common mistakes include under-processing jars, overfilling, using untested recipes, and neglecting to check jar seals after processing.
Explore our world on X!

Urban Food Stockpiling: Key Tips for Urbanites
Exploring the Essentials of Urban Food Stockpiling What does urban food stockpiling entail? Urban Food Stockpiling: Urban food stockpiling involves the strategic accumulation and management of food resources within city environments to mitigate potential disruptions. This practice focuses on selecting durable items and implementing rotation strategies to maintain freshness and safety. In densely populated urban […]

Food Dehydration Tips: Essential Techniques
Discover the Advantages of Food Dehydration for Health and Sustainability Preserving Nutritional Value Effectively Food Dehydration Tips: Food dehydration is one of the most efficient techniques for preserving the vital nutrients in a variety of foods. This process not only removes excess moisture but also effectively locks in essential vitamins and minerals, preserving the food's nutritional […]

Edible Plant Safety: A Universal Guide
Understanding Edible Plant Safety: A Comprehensive Guide What Exactly Are Edible Plants? Edible Plant Safety: Edible plants encompass a diverse range of fruits, vegetables, herbs, and other plant parts that are safe for human consumption. Knowing what qualifies as an edible plant is crucial for ensuring safety, particularly for those interested in foraging or incorporating wild […]

Blizzard Food Storage: Essential Tips and Techniques
Essential Steps for Preparing for Blizzard Conditions Effective Strategies for Stocking Non-Perishable Foods Blizzard Food Storage: When preparing for a blizzard, it is vital to focus on stocking non-perishable foods to ensure you have adequate sustenance throughout the storm. Such items are not only convenient but also possess a long shelf life, making them ideal […]


This topic on canning really resonates with me! I’ve been canning for a few years now, and the whole process can feel so rewarding. It’s not just about preserving food; it turns into a kind of ritual that connects you with the seasons and the bounty they offer. There’s something special about waiting for those farm-fresh tomatoes to reach their peak in late summer and then turning them into homemade salsa or marinara sauce that gets stored away for the colder months.
It’s fascinating to see how canning has not only persisted but evolved into a beloved practice for so many. I remember my first experience with canning a batch of summer tomatoes—I was amazed at how something so simple could transform ingredients into treasures for the colder months. The joy of opening up a jar of homemade salsa in winter and being transported back to the vibrant flavors of summer is truly special.